Introduction
Bootstrap Studio is a web design and development application that provides a powerful desktop environment for building responsive web pages. It offers an extensive collection of components such as headers, footers, galleries, and slideshows, along with basic elements such as spans and divs. Bootstrap Studio is built on the Electron framework and is cross-platform, making it accessible to a wide range of users.
Bootstrap Studio is ideal for creating websites and prototypes, and it offers several advanced features, including Smart Drag & Drop, Linked Components, Create Your Own Components, Real-time Preview, JavaScript Editing, Import Existing Websites, Connect External Editors, One-click Publishing, Grid Tools, Smooth Animations, Google Webfonts, Command Palette, Themes and Icons, and Always Up to Date. The application is designed to be intuitive and user-friendly, making it accessible to users with various levels of expertise. Bootstrap Studio is a proprietary software, and users must purchase a license to use it.
Features of Bootstrap Studio
- A powerful desktop app for creating responsive websites using the Bootstrap framework.
- A powerful desktop app for designing and prototyping websites
- Smart Drag & Drop
- Create Your Own Components
- Online Library
- Linked Components
- Realtime Preview
- Advanced CSS and SASS Editors
- JavaScript Editing
- JavaScript Editing
- Import Existing Websites
- Connect External Editors
- One-click Publishing
- Grid Tools
- Smooth Animations
- Google Webfonts
- Command Palette
- Themes and Icons
- Always Up to Date

Prerequisites of Bootstrap Studio
While no programming knowledge is required to use Bootstrap Studio, having a basic understanding of HTML, JavaScript, and CSS can be beneficial.
Installation
To install Bootstrap Studio, users must purchase a license as it is a proprietary software. The standard version costs $29, which is suitable for personal use and offers a wide range of components. On the other hand, the lifetime version costs $60 and is recommended for corporate projects.
Visit the bootstrap studio application
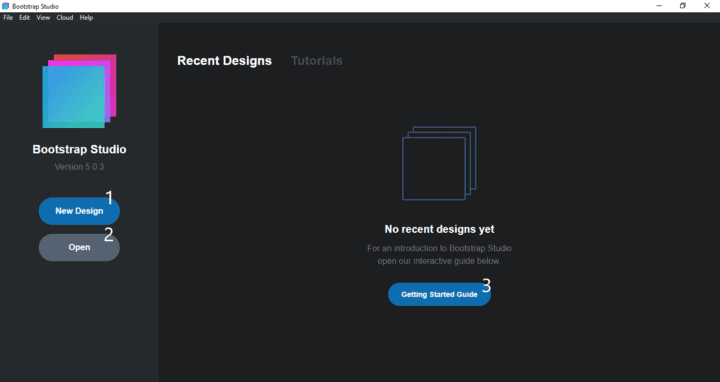
- When you open the application you will see this window
- New design: to create a design
- Open: to open an existing bootstrap studio project
- Getting started: this allows you to follow the documentation of bootstrap studio
Creating new design

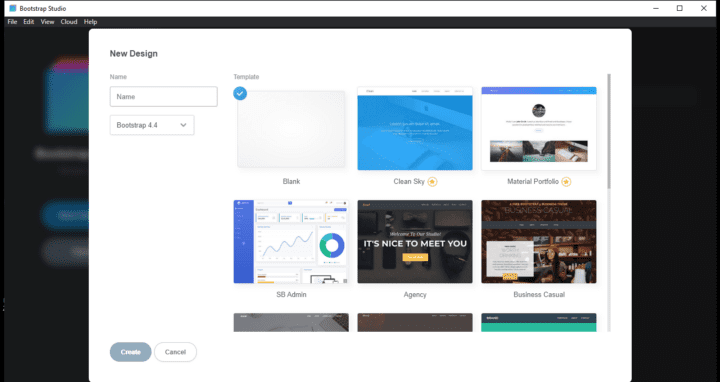
- Click on the new design button and you will see that there is a full design already made for us, select the blank which is an empty page. In the name write home which will be the titles of the pages of our design then click on create.
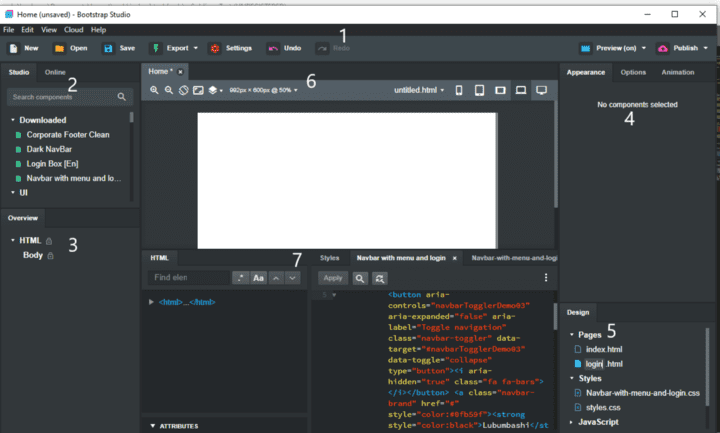
- Tab 1 allows you to control our project, allows us to open the parameters, export our design, start the server, etc. I strongly advise you to explore it.
- Tab 2 includes the default components that come with the bootstrap studio (please explore) in the studio part and in the online part they are components that we download online (like login pages, articles, etc) Components are elements that we will put on our page (like menu, footer, etc).
- Tab 3 Overview is where all the HTML tags of our page appear, by default the HTML and body tags are locked so we can’t modify them.
- Tab 4 it is about the appearance of our page, the animations, the mode of display
- The tab 5 Design there is the menu page which will contain all the HTML pages of our project, the menu style which will contain the CSS files of our project, the menu javascript which will contain the .js files of our project, the menu font which will contain the font files of our project, the menu image which will contain all the images of our project.
- The tab 6 there is our empty page which is the body on which we will put our components, there is already the page index.html which is chosen by default, and also the forms of displays of our design according to the dimensions of the screen (telephone, tablet, MD, pc, desktop).
- Tab 7 is the same as the text editor there is the HTML part that allows you to view the different tags on the different pages of our design and the style part that allows you to edit the code and see the style of our page.

Download components online
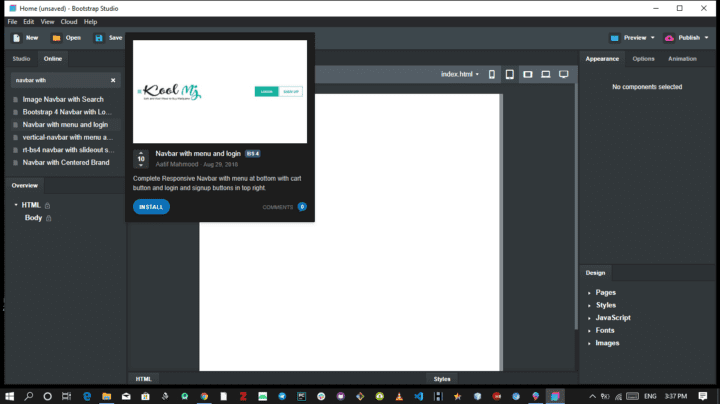
- Click in the search area and write navbar to have a menu, take navbar with menu and login click on install.
- Type login in the search bar and take Login Box and install.
- Do the same for a slide search best carousel slide and install it.

Drag and drop UI components
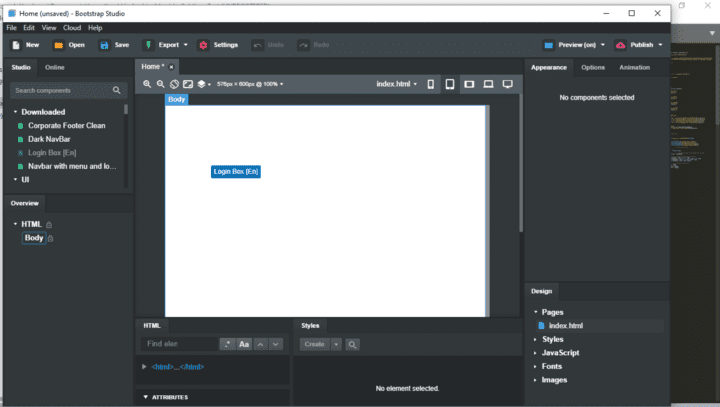
- After downloading the components we see in tab 2 the studio part which has a download menu that has just been added and contains the downloaded components.
- To arrange the components on our body make click on the component drag it on the body and drop the ca be placed according to the hierarchy of components in HTML
- Select the navbar with the menu and log in and drop it on our page, do the same for the best carousel slide and footers basics.

Create a new login.html page
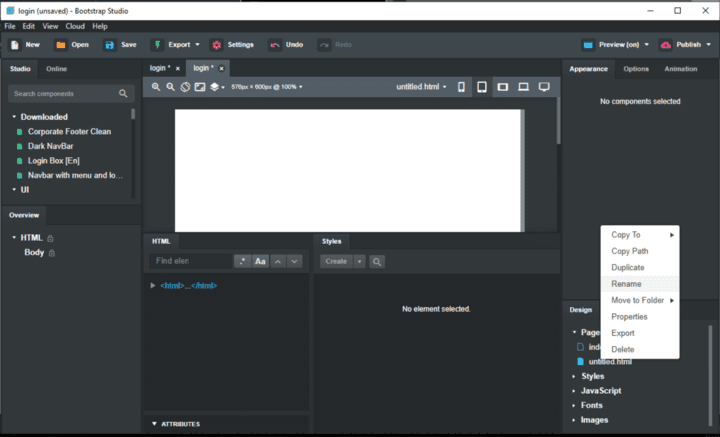
- Go to tab 5 in the page menu and click on the page login.html here it is now selected and we have an empty body
- Select Login Box [En] drag and drop it on the body link index.html to login.html
- In index.html select our navbar and edit the code in the login tag, enter as href login.html then press apply and it’s done, you have just connected the two pages.

Launch the server

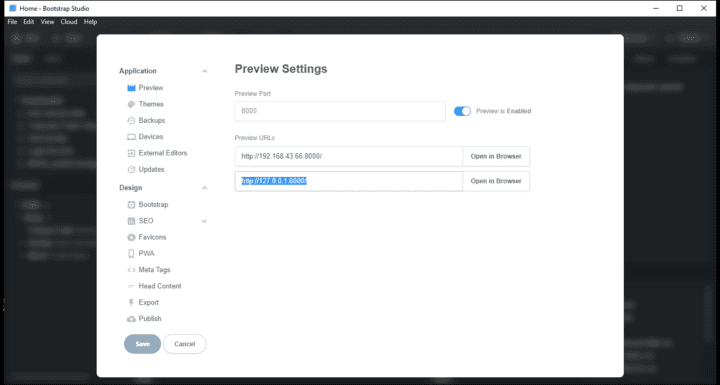
- In tab 1 click on preview and activate it you can go to preview options to see the port used by our server, as well as the URL
- You just have to type 127.0.0.1:8000/ to see what our site looks like in the browser.

